IOS-UIImageView
UIImageView,顾名思义,是用来放置图片的。
创建一个UIImageView
UIImageView *imageView1 = [[UIImageView alloc] init];

UIImageView *imageView2 = [[UIImageView alloc] initWithFrame:(CGRect)];

UIImageView *imageView3 = [[UIImageView alloc] initWithImage:(UIImage *)];

UIImageView *imageView4 = [[UIImageView alloc] initWithImage:(UIImage *) highlightedImage:(UIImage *)];

UIImageView *imageView5 = [[UIImageView alloc] initWithCoder:(NSCoder *)];
比较常用的是前边三个。至于第四个,当这个ImageView的highlighted属性是YES时,显示的就是参数highlightedImage,一般情况下显示的是第一个参数UIImage。
contentMode属性
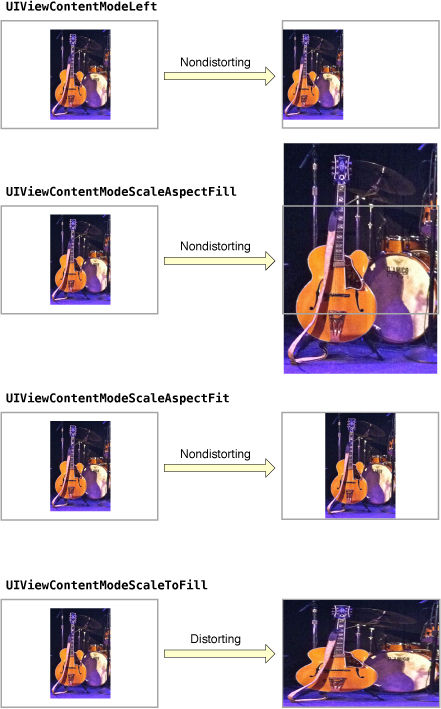
这个属性是用来设置图片的显示方式,如居中、居右,是否缩放等,有以下几个常量可供设定:
UIViewContentModeScaleToFill,  缩放内容到合适比例大小
UIViewContentModeScaleAspectFit,      // contents scaled to fit with fixed aspect. remainder is transparent 缩放内容到合适的大小,边界多余部分透明
UIViewContentModeScaleAspectFill,     // contents scaled to fill with fixed aspect. some portion of content may be clipped.缩放内容填充到指定大小,边界多余的部分省略
UIViewContentModeRedraw,              // redraw on bounds change (calls -setNeedsDisplay) 重绘视图边界
UIViewContentModeCenter,              // contents remain same size. positioned adjusted.  视图保持等比缩放
UIViewContentModeTop, 视图顶部对齐
UIViewContentModeBottom, 视图底部对齐
UIViewContentModeLeft, 视图左侧对齐
UIViewContentModeRight, 视图右侧对齐
UIViewContentModeTopLeft, 视图左上角对齐
UIViewContentModeTopRight, 视图右上角对齐
UIViewContentModeBottomLeft, 视图左下角对齐
UIViewContentModeBottomRight, 视图右下角对齐
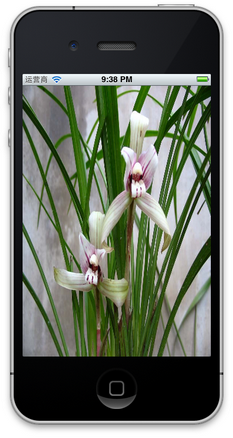
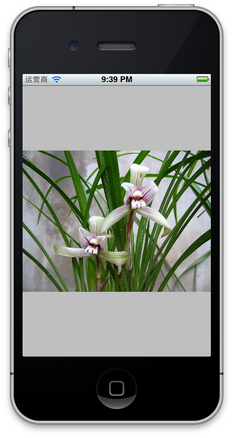
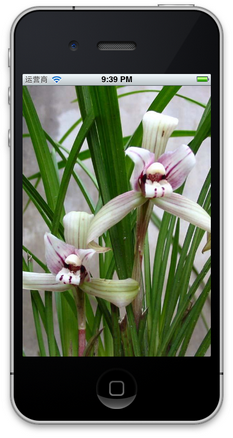
注意以上几个常量,凡是没有带Scale的,当图片尺寸超过 ImageView尺寸时,只有部分显示在ImageView中。UIViewContentModeScaleToFill属性会导致图片变形。UIViewContentModeScaleAspectFit会保证图片比例不变,而且全部显示在ImageView中,这意味着ImageView会有部分空白。UIViewContentModeScaleAspectFill也会证图片比例不变,但是是填充整个ImageView的,可能只有部分图片显示出来。
UIViewContentModeScaleToFill效果
UIViewContentModeScaleAspectFit效果
UIViewContentModeScaleAspectFill效果
contentScaleFactor属性
在iphone的retina屏幕上面,必须要设置,contentScaleFactor属性。这个属性的默认值是1。对应的retina屏幕需要是2.可以通过下面的方式来设置:
[imageView setContentScaleFactor:[[UIScreen mainScreen] scale]];
为什么要设置contentScaleFactor属性呢?
比如一个32*32的图片,在高分辨率下,如果要位置大小都不变,那么32*32的图像点显示在64*64的像素(光栅)上。在不改程序的情况下,一个图像点的颜色对应4个颜色一致的像素点。这样图片不光模糊,而且还有锯齿。
所以,要需要一个64*64的新图片代替原图片。在不改程序代码的情况下如何实现?SDK要求我们再加一个图片,比如原图片是image.png,新加的就是image@2x.png,是64*64的。
在系统scale=2.0时,加载图像时先找@2x的,找不到在找原来的,所以就是只要给所有的图像资源文件都加上一个新的高清晰的@2x文件,程序就自动在高分辨屏幕上用高清晰图片,低分辨上用低清晰图像。
看同一张图片,有如下几个情况:
当UIScreen.scale=2.0时,读取image@2x.png, UIImage.scale=2.0 UIImage.size=16*16
当UIScreen.scale=1.0时,读取image.png, UIImage.scale=1.0 UIImage.size=32*32
当UIScreen.scale=2.0时,读取image.png, UIImage.scale=1.0 UIImage.size=32*32 (不存在@2x文件的时候)
[参考:]http://www.douban.com/note/77384858/
clipsTobounds属性
不显示超出显示范围的图片
clipsTobounds = YES
[参考]http://blog.csdn.net/ch_soft/article/details/6742915
userInteractionEnabled属性
如果父视图为ParentView包含一个Button,如果再ParentView上添加子视图ChildView,且ChildView盖住了Button,那么Button就得到不响应了,为了让Button响应,可以设置ChildView的userInteractionEnabled = NO;
[参考]http://blog.csdn.net/studyrecord/article/details/6536358
其他属性
// 是否栅格化。
    // YES:会栅格化层中的数据(如:图像)
    // NO:不栅格化
    // 我们知道,栅格化数据是将矢量图变为位图。所以,如果层中的内容是变动的,每次都需要栅格化,就会影像效率。一般设置为NO
    [imgShadow.layer setShouldRasterize:NO];

    // 设置边框颜色
    [imgShadow.layer setBorderColor: [[UIColor whiteColor] CGColor]];
    // 设置边框宽度
    [imgShadow.layer setBorderWidth: 1.0];
    // 设置阴影偏移量,CGSizeMake(x轴方向, y轴方向)
    [[imgShadow layer] setShadowOffset:CGSizeMake(1, 1)];
    // 设置阴影颜色
    [[imgShadow layer] setShadowColor:[UIColor redColor].CGColor];
    // 设置阴影半径
    [[imgShadow layer] setShadowRadius:3];
    // 设置透明度
    [[imgShadow layer] setShadowOpacity:1];

// 当设置为YES时,超过边界的将被遮盖(隐藏),经常与cornerRadius,属性使用。这样,圆角外的区域将被遮盖

[imgShadow.layer setMasksToBounds:YES];
    // 设置圆角
    imgShadow.layer.cornerRadius = 10;
生成新的图片
解决方案一,使用图片按照一定尺寸生成新的图片
-(UIImage*)imageWithName:(NSString*)name andSize:(CGSize) size{
	UIImage *selTab = [[UIImage imageNamed:name] imageWithRenderingMode:UIImageRenderingModeAlwaysOriginal];//UIImageRenderingModeAlwaysOriginal 始终绘制图片原始状态,不使用Tint Color。
	UIGraphicsBeginImageContext(size);
	[selTab drawInRect:CGRectMake(0, 0, size.width, size.height)];
	UIImage *reSizeImage = UIGraphicsGetImageFromCurrentImageContext();
	UIGraphicsEndImageContext();
	return reSizeImage;
}
解决方案二,使用规定的颜色和尺寸生成新的图片
- (UIImage *)imageWithColor:(UIColor *)color andSize:(CGSize)size{
	CGRect rect = CGRectMake(0, 0, size.width, size.height); //  <- Here
	// Create a 1 by 1 pixel context
	UIGraphicsBeginImageContextWithOptions(rect.size, NO, 0);
	[color setFill];
	UIRectFill(rect);   // Fill it with your color
	UIImage *image = UIGraphicsGetImageFromCurrentImageContext();
	UIGraphicsEndImageContext();

	return image;
}
图片拉伸
- (UIImage *)stretchableImageWithLeftCapWidth:(NSInteger)leftCapWidth topCapHeight:(NSInteger)topCapHeight;
ios中提供了上面的方法来实现图片的拉伸。leftCapWidth表示是左侧需要保留的像素数。topCapHeight表示是顶部需要保留的像素数。效果相当于只能保持一边固定,拉伸另一边。
调用样例如下:
UIImage* image = [UIImage imageNamed:@"listbg2"];
image = [image stretchableImageWithLeftCapWidth:floorf(image.size.width/2) topCapHeight:60];
[参考]http://blog.csdn.net/w122079514/article/details/7848980